Improving your video conference setup
After a year of entirely virtual meetups and conferences, it seems unlikely at this point that we’ll ever go back to 100% in-person events. Like workplaces, most events seem to be leaning towards a hybrid model, with participants attending both in person, and virtually over a livestream. So with that in mind, what investments should you be making in your setup to ensure that when you choose to participate virtually, you’re not giving a sub-par experience to the people attending your talk?
When reading the advice below, it’s important to remember that i’m coming at this from my perspective as a Developer Advocate. My job involves far more conference speaking than most, so it’s entirely possible that my setup is complete overkill for the majority of situations, but some people just like to invest in these things, so if you’re not into public speaking, but long for your Zoom game to be on point, then have at it, I’m not here to judge!
You get out what you put in
This is probably obvious, but up to a certain point, the more you spend, the better a result you’ll get. That isn’t to say you can’t lower the costs here and there, but the reality is that all these things should be considered an investment and the costs viewed accordingly. Where possible, I’ve included both expensive and cheaper options. I’ve used many of these at some point, so can stand over them, but where I haven’t had the chance to try something yet, I’ll mention that.
Audio
If you’re just starting out, audio is 100% where you should start. People will forgive poor video, but if they can’t hear you speaking clearly, then staying engaged with your content will be a real challenge.
Higher end option - Yeti by Blue ($130)
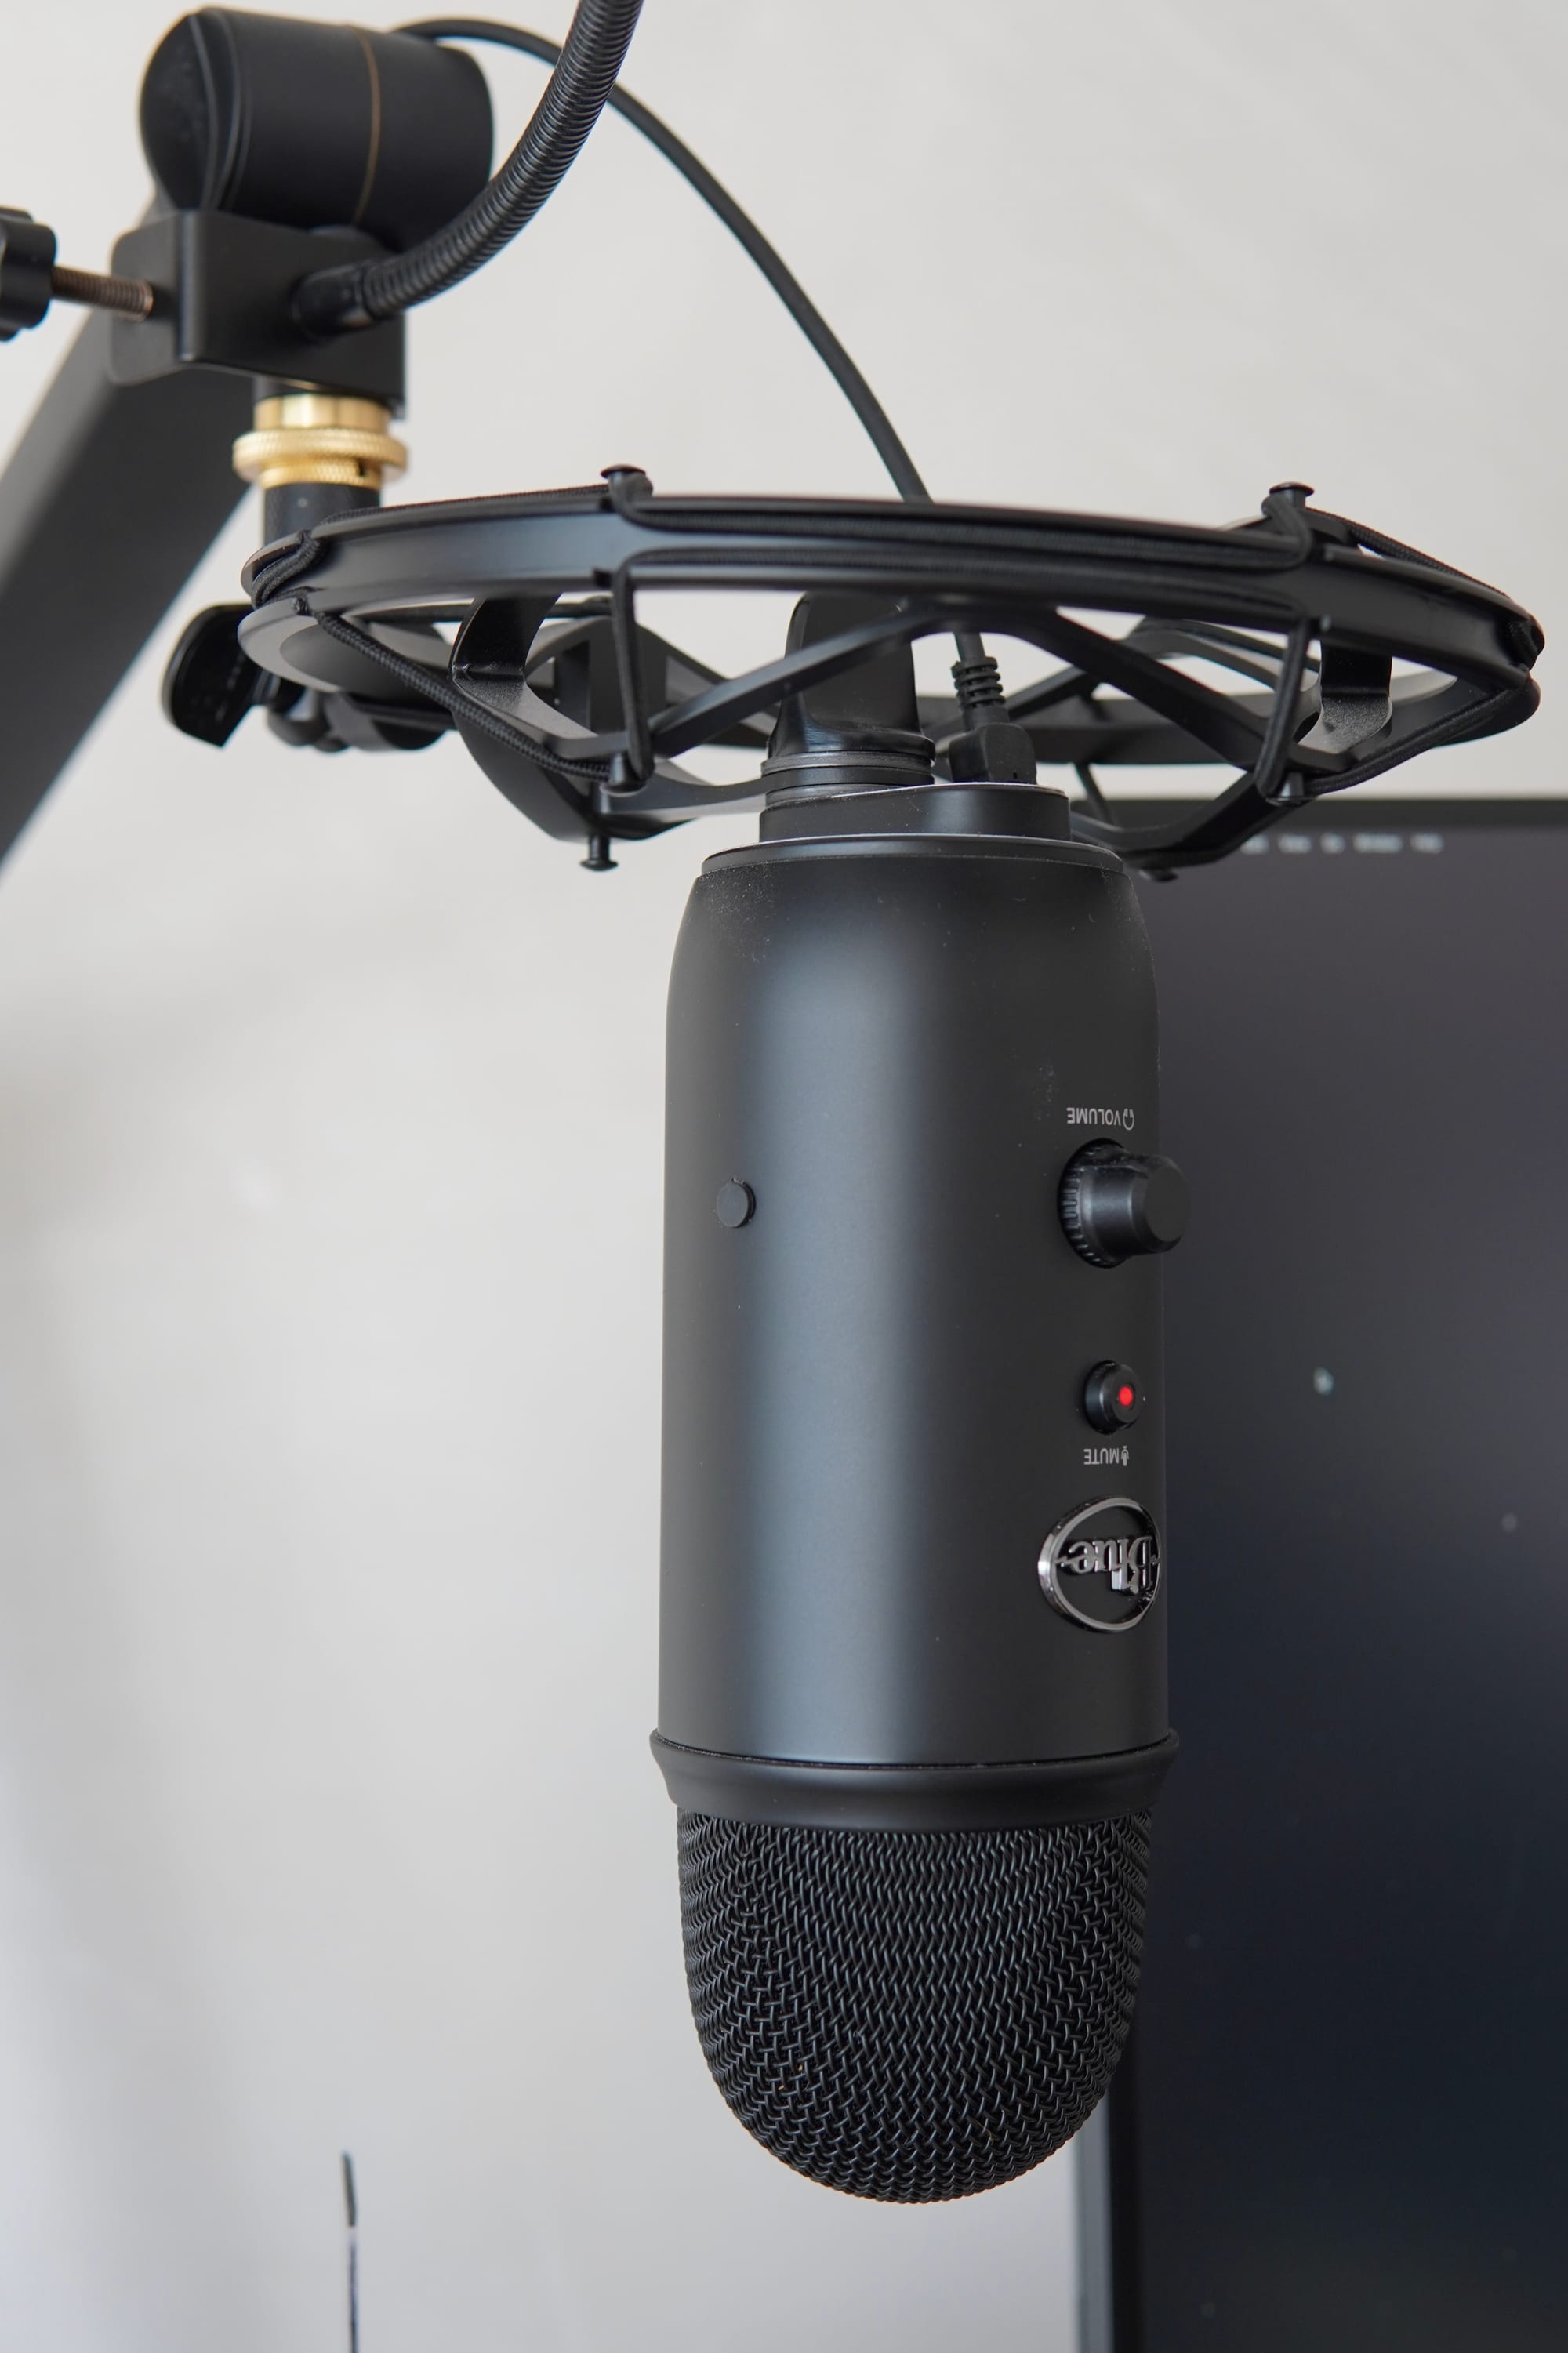
The Yeti by Blue is almost a de facto standard now for people running smaller podcasts and is what I use. You can adjust the gain, have different settings for one person using it versus multiple, you can mount it or have it on your desk, and easiest of all, it supports USB, so you don’t need a second piece of hardware to run it through.
Mid-range option - Snowball by Blue ($70)
At about half the price, the Snowball is Blue’s “budget” option. I’ve never used it myself, but it’s well regarded and as the name implies, is from the same manufacturer as the Yeti, so has some similar benefits.
Budget conscious option - The mic on your headphones
If you can’t afford to get a dedicated microphone, at a minimum you should use the microphone on your cellphone’s headphones. If you have AirPods or AirPods Pro, even better, use those. It’s moving the microphone a lot closer to your mouth, and the AirPods do fancy beam-forming things.
Video
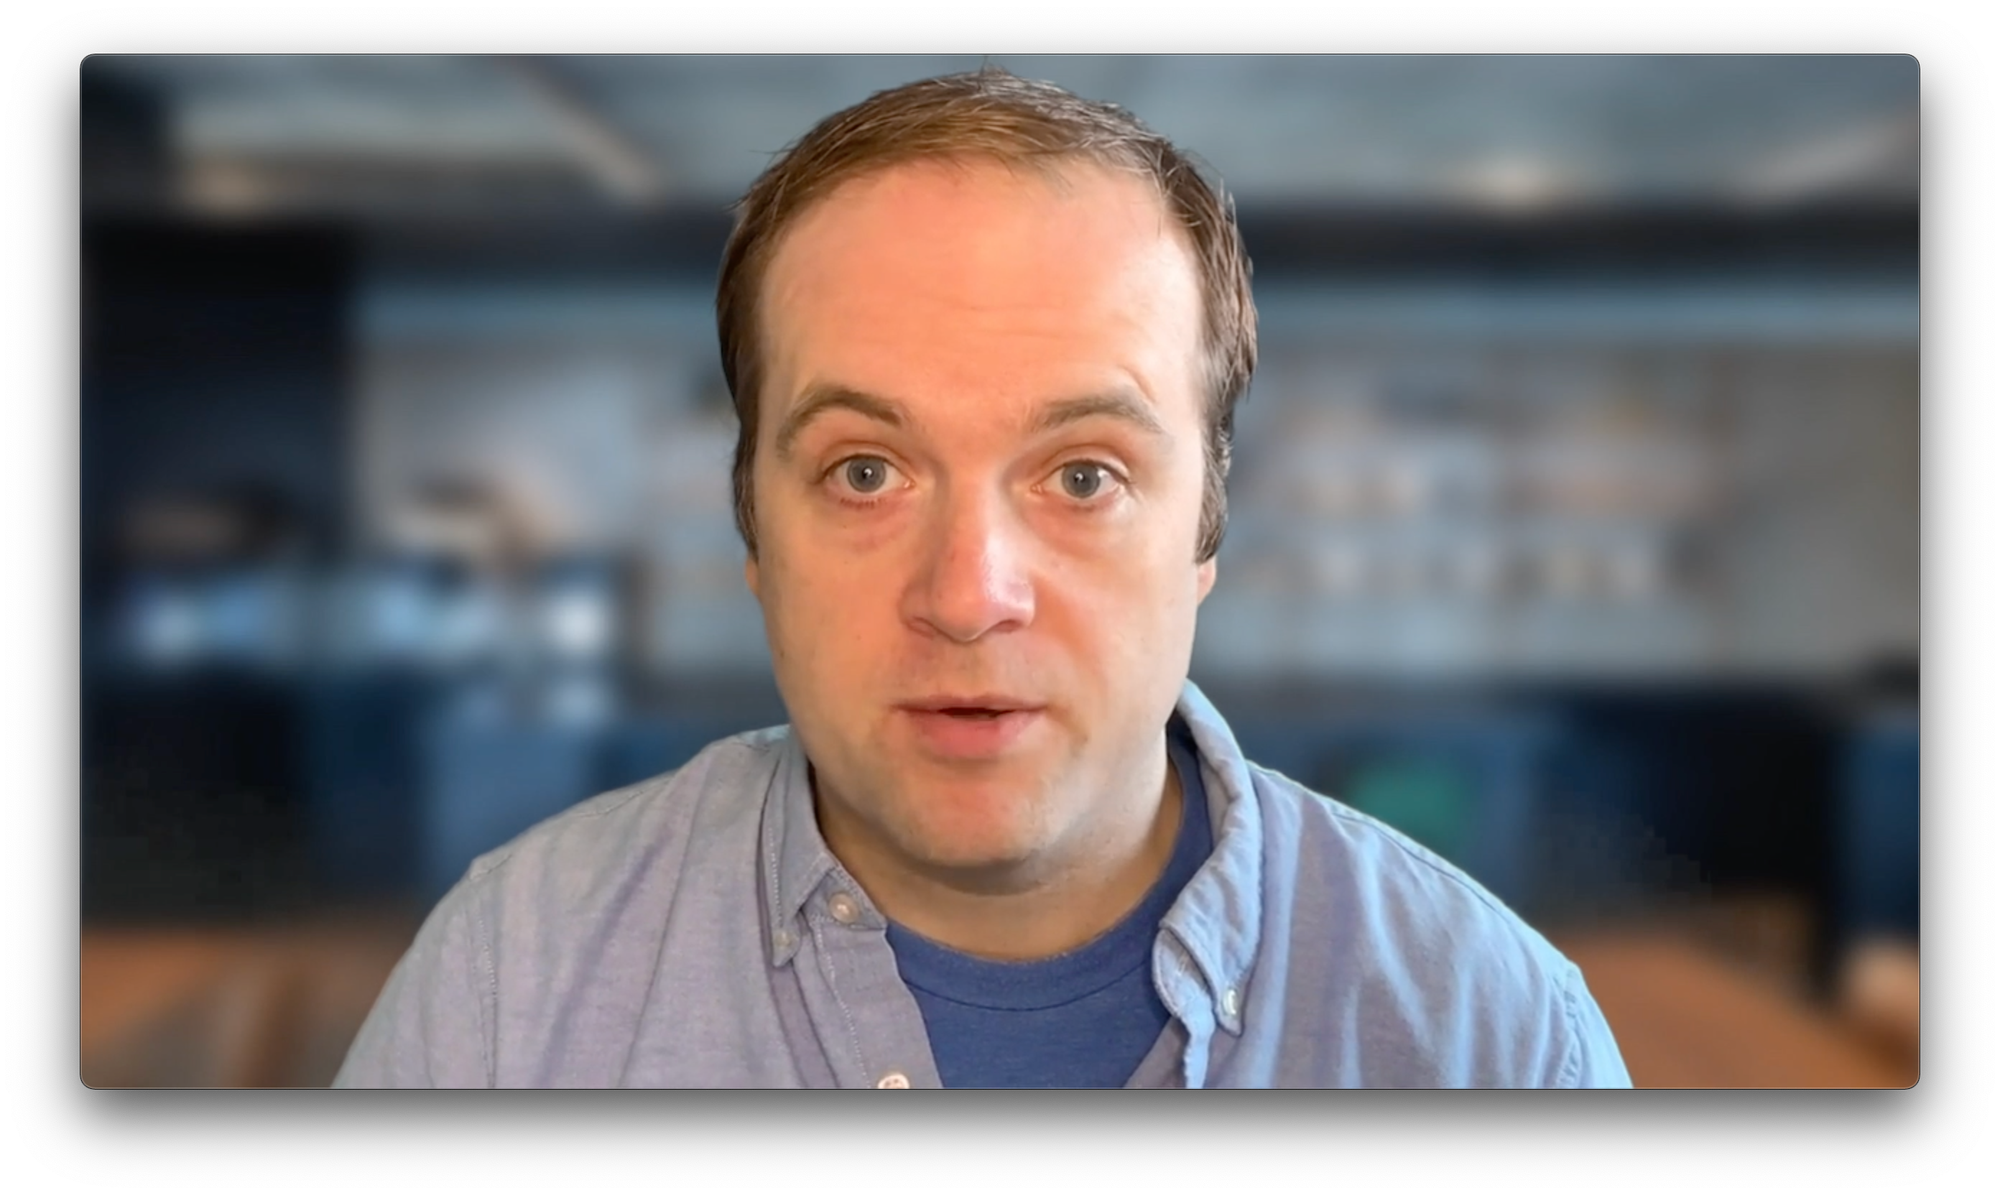
Higher end option - Sony a6400 w/ Sigma Prime lens and Elgato CamLink 4K ($1300)
There’s no getting around the fact that $1300 is a lot for what you’d essentially be using as a webcam. But if you want to justify it to yourself, I’d point out that you can take it off the mount when you’re not presenting and you have a very good camera for taking photos of your kids, nature, friends etc.
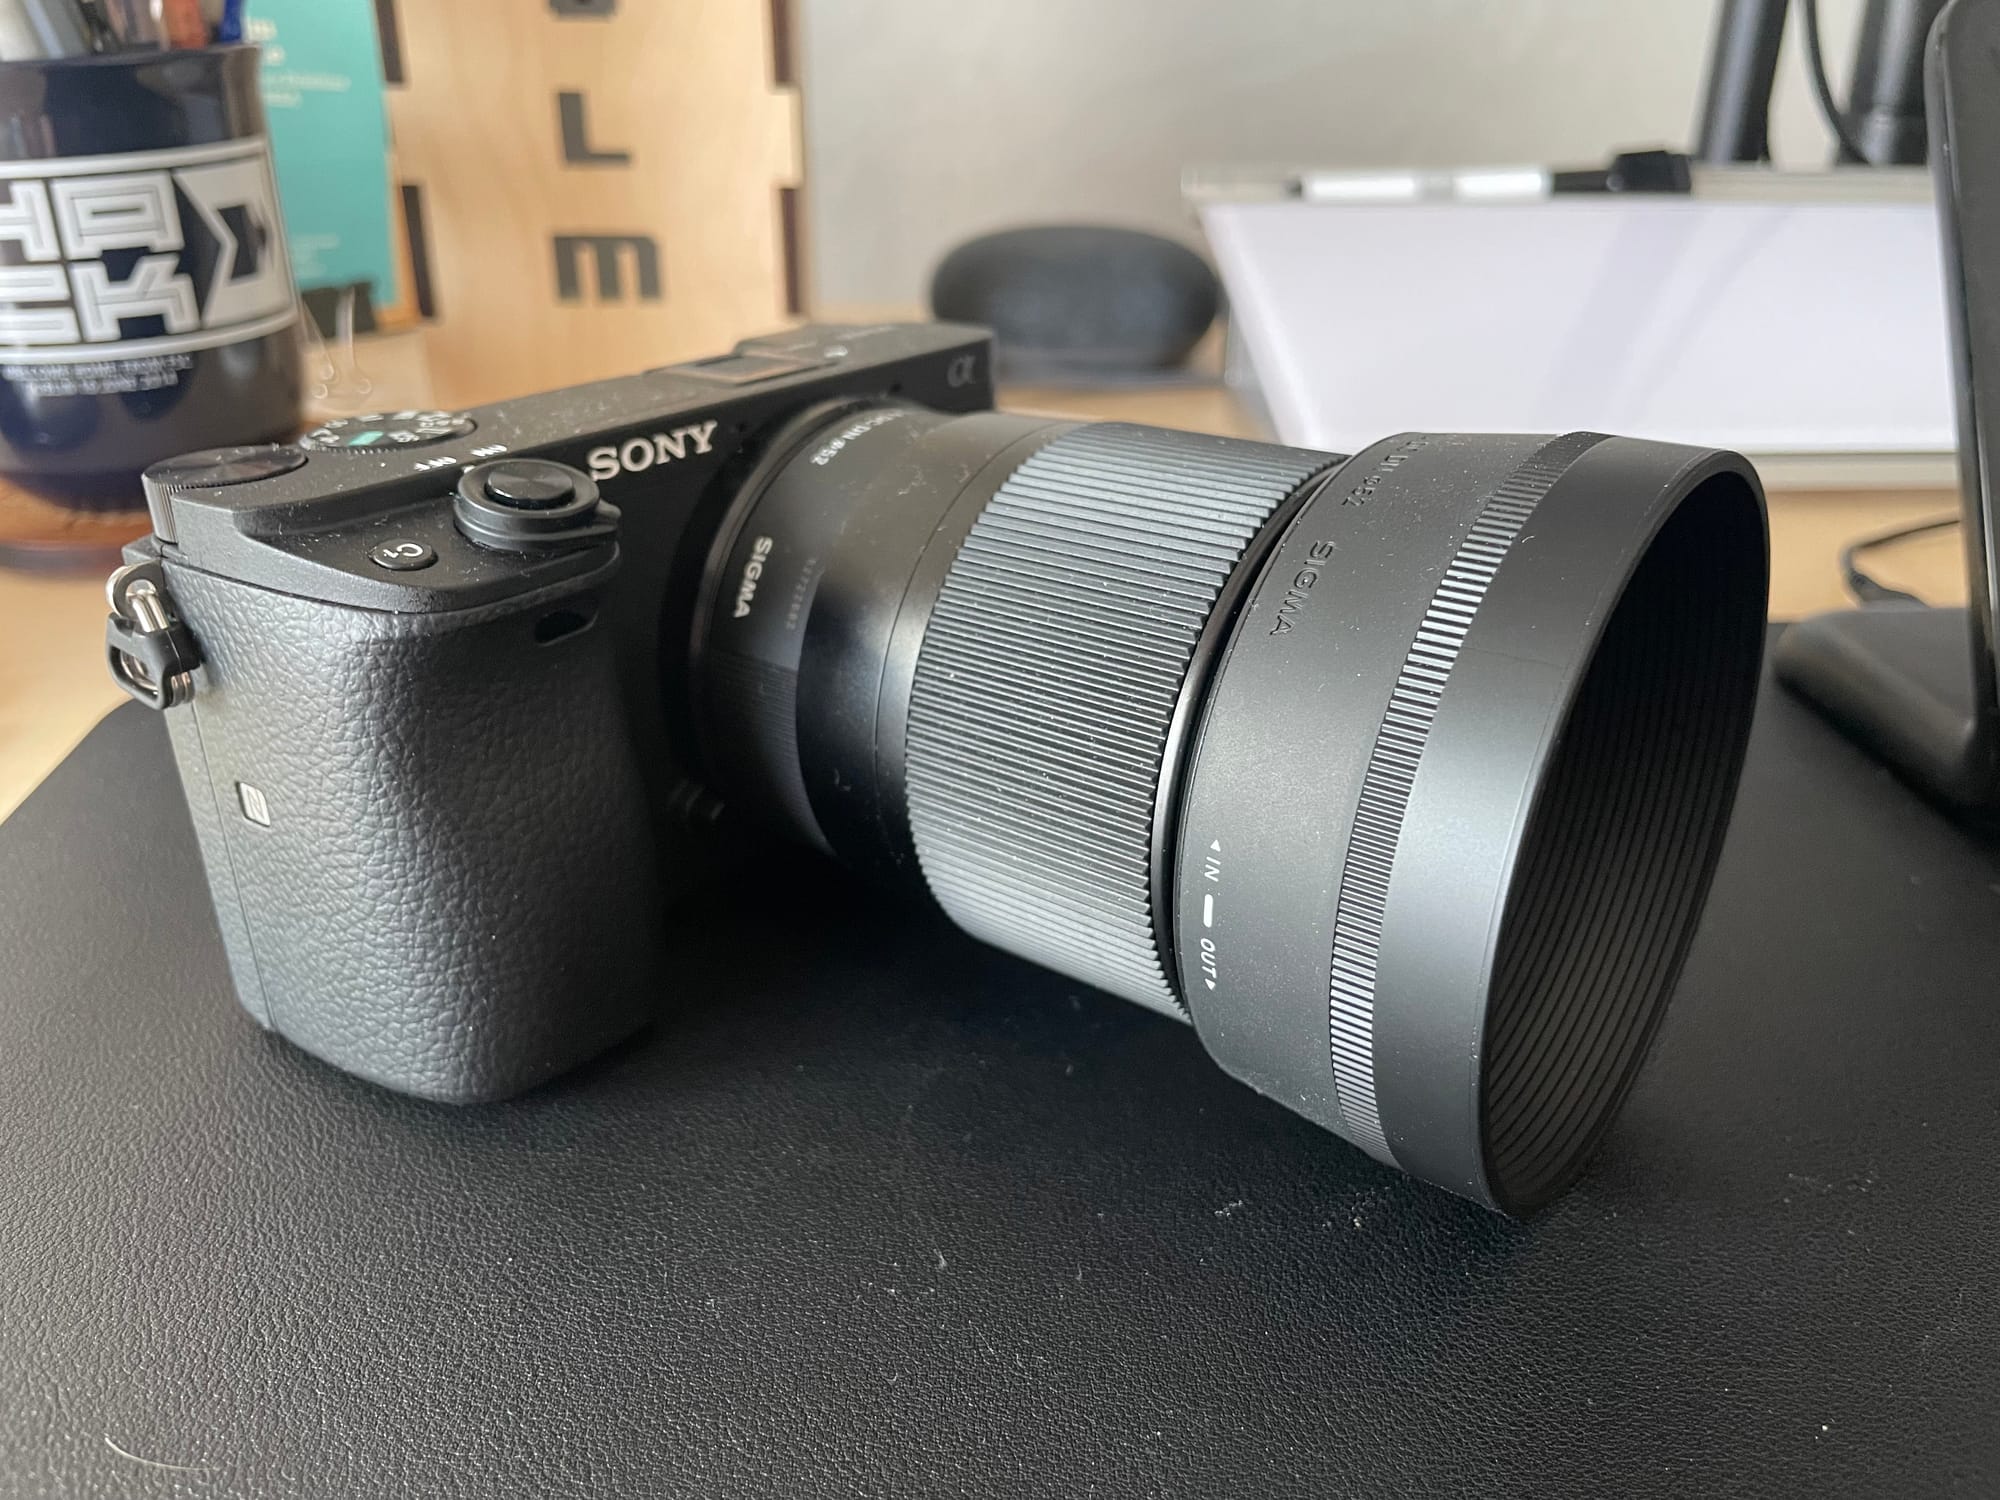
Anyway, this is definitely going to give you a serious step up from the built-in webcam you’re probably using. The Sony a6400 has super fast auto focus, an intuitive UI and a flip up LCD so you can position yourself. Pair that with a 30mm Sigma Prime Lens to give you that nice bokeh (blurred background) and you’re gonna look great.
For an example of the kind of output you can expect, here’s a recording of an event I did that was pushed through Zoom then through Facebook, so you can imagine there’s a lot of compression going on and the result I think still looks pretty good. If you skip to around the 20 minute mark, my video is full screen and that will give you the best impression.
It’s a popular choice for Streamers, YouTubers and other video professionals, so there’s a wealth of information out there on how to configure it best, plus it’s widely supported. One last thing though. The a6400 apparently supports directly connecting over USB, but I was recommended to use an Elgato CamLink 4K and did so, but that could be a way to shave $120 off your costs.
Mid-range option - Logitech Brio ($199)
Coming in at just under $200, the Logitech Brio is still pretty pricey for a Webcam, but I’ve been told by those who own them (I do not) that the quality is top notch, as it pushes out 4K quality video.
Budget conscious option - Reincubate Camo ($39 per year)
If you have an iPhone, then Reincubate Camo is a great investment. For about a year I paired it with my iPhone XS and got really great results. It was a vast improvement from the Logitech C920 I had.
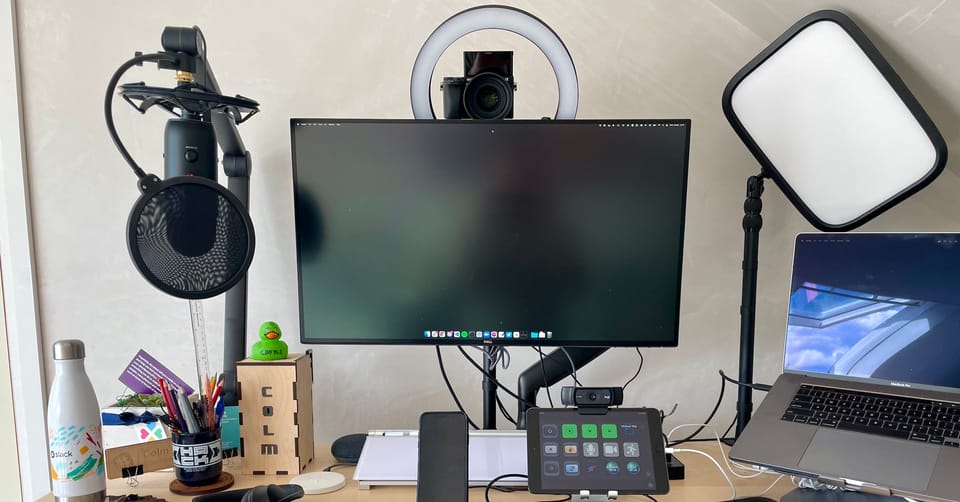
Lighting
Once you’ve settled on video and audio, you’re likely already in a good spot, but if you want to go further, the next thing I’d consider is lighting. I have two different lights I use when recording. Even one of these is going to be pretty good.
Higher end option - Elgato Key Light ($199)
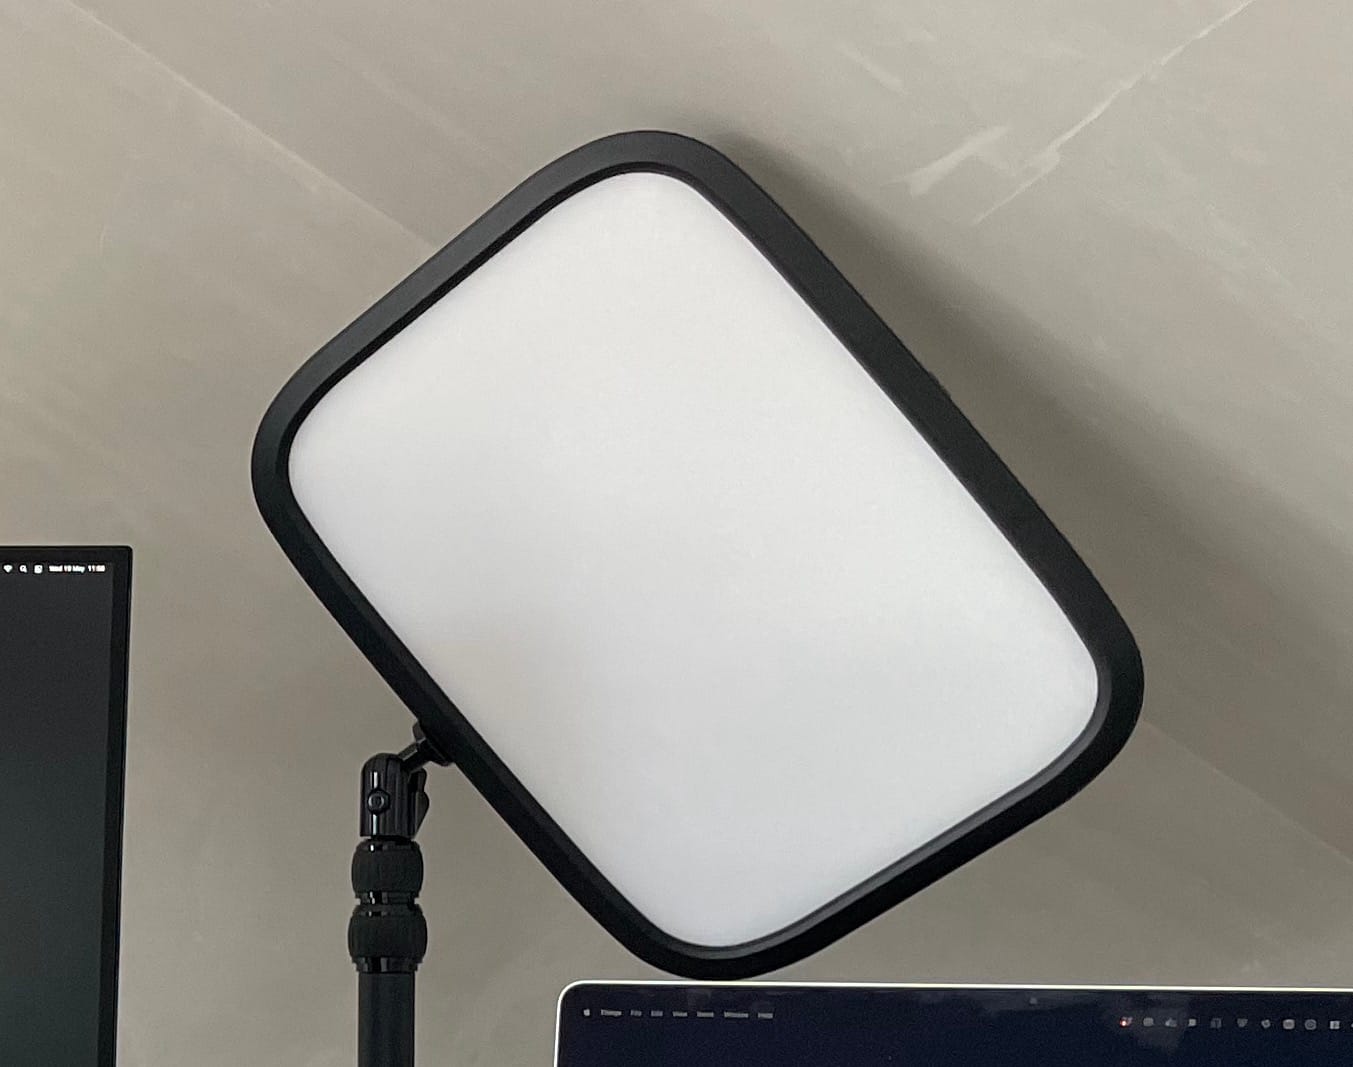
I use a single Key Light clamped to my desk and offset to my right. The warmth of the light is adjustable from very bluish to very yellowish, and the output is adjustable from barely on to staring directly into the sun. It doesn’t get warm and has some nice touches like being controllable from my laptop (vs a physical button).
Mid range option - Generic Ring Lights (starting from $10)
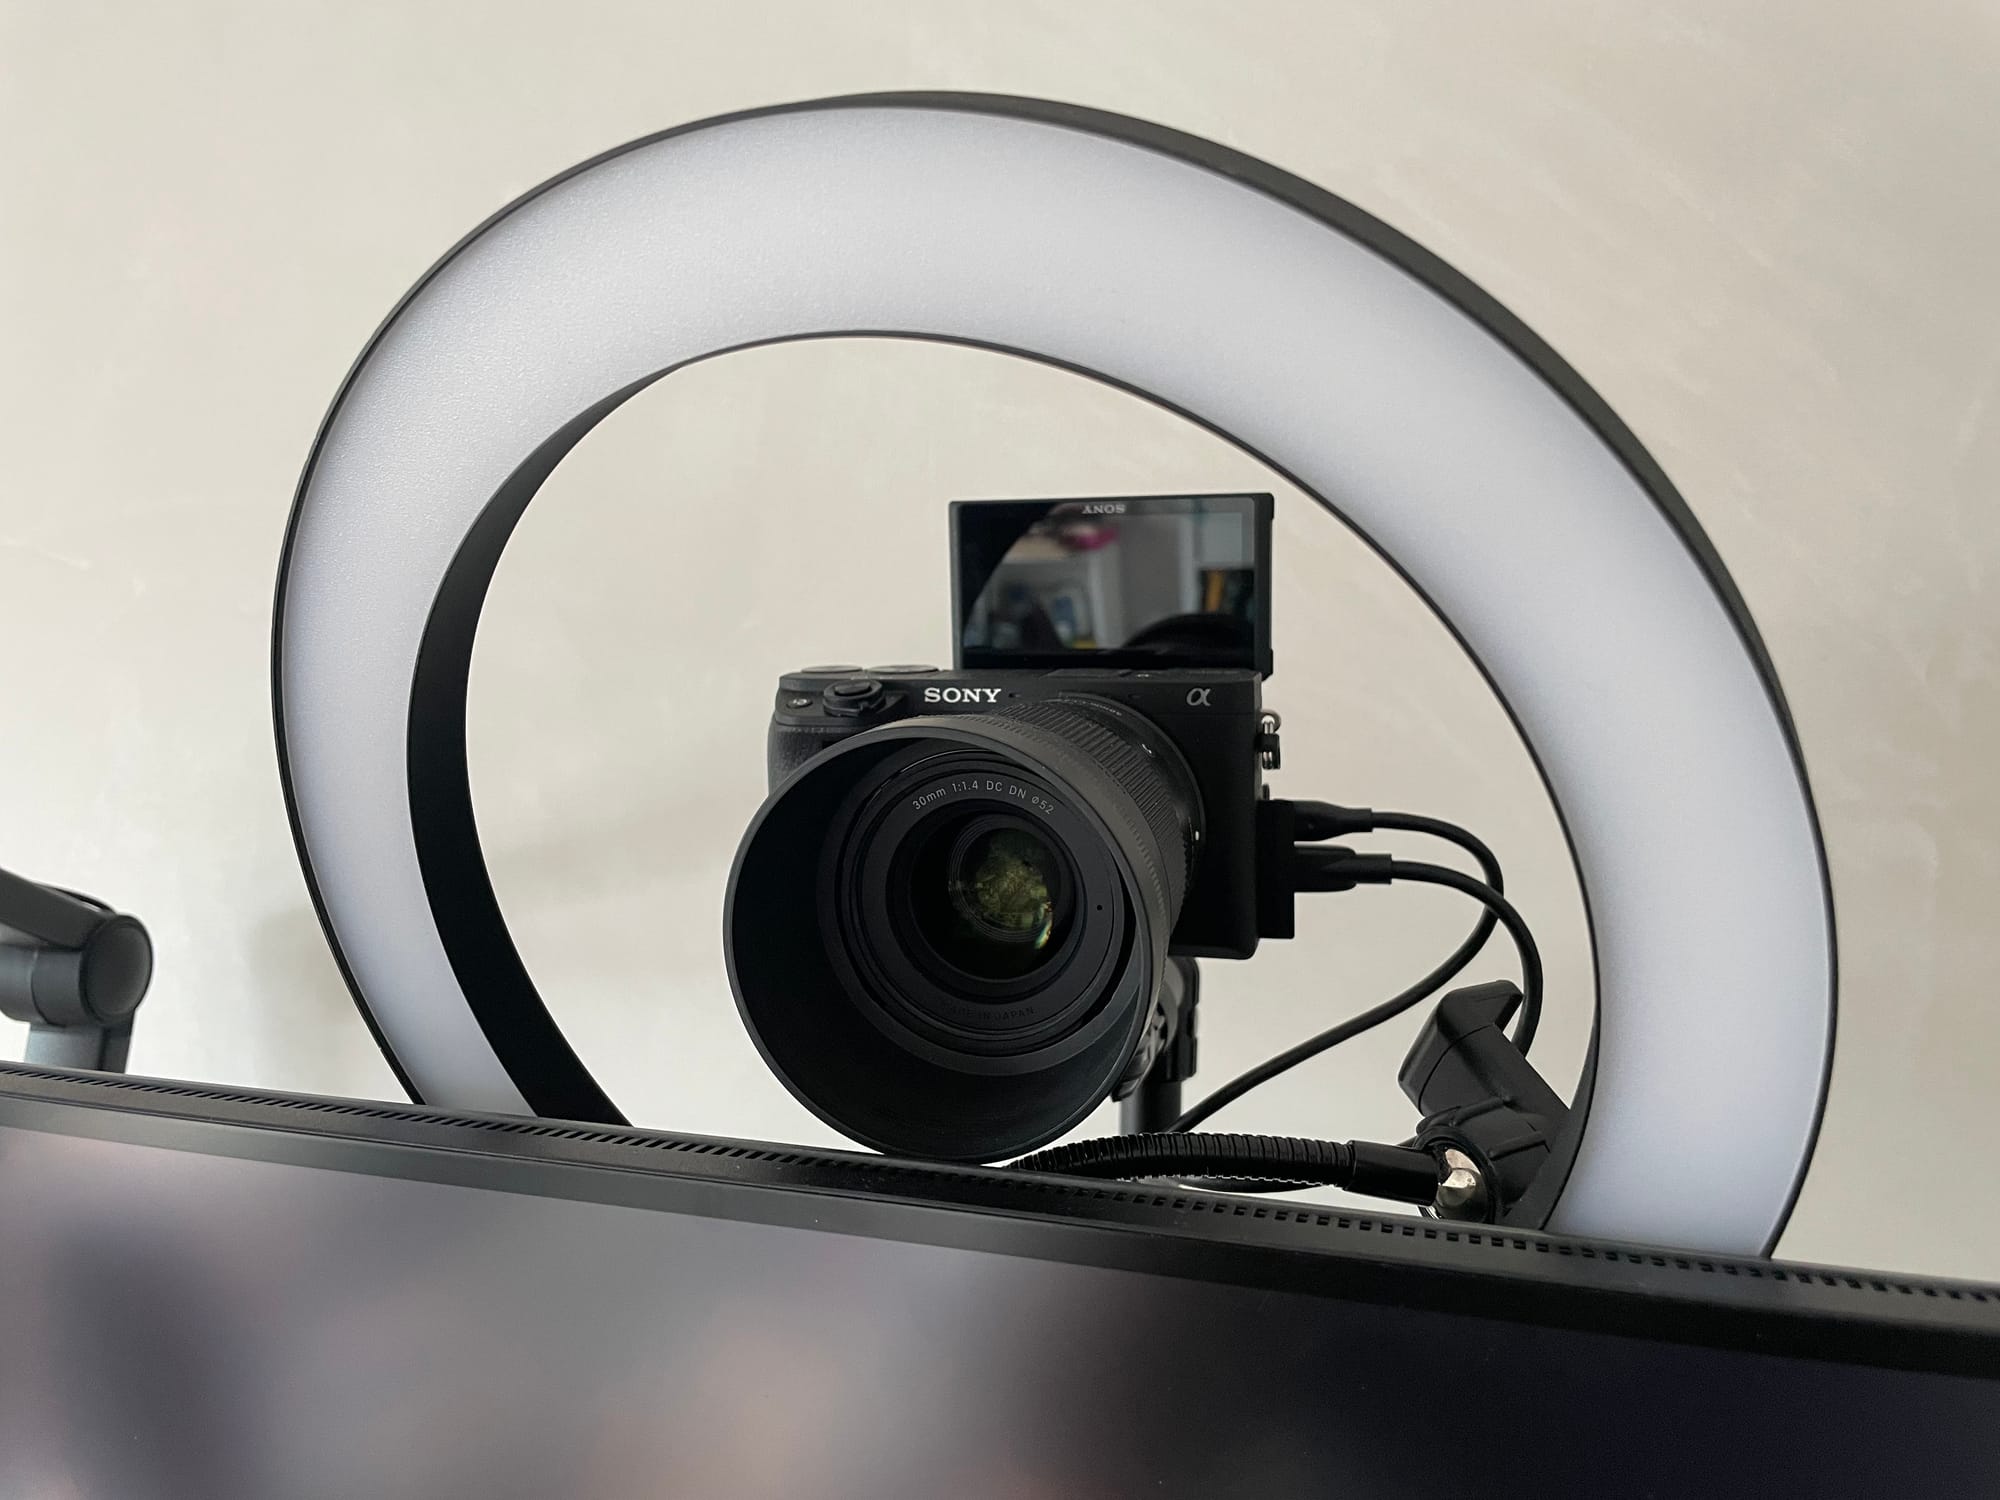
I originally started out with $50 ring light that I bought on Amazon. It’s since been discontinued, but Amazon has an almost unlimited supply of these things. What you’re looking for when considering them is
- Can you adjust the brightness? (Ideally yes)
- Is their a mount for your camera / phone built in? (Ideally yes)
- Does it plug into the wall or into USB? (I prefer USB, but this is personal preference)
- What size is it? (My one has an inner diameter of 8 inches and that feels about right)
Budget conscious option - Sunlight (free I guess?)
If you’re tapped out budget wise, but still look dark, consider if you can move your desk so that you face a window, because natural light can be pretty flattering. What you absolutely don’t want in the background is a large light source like a window or bright lamp. No amount of camera trickery will compensate well for that.
All the other things
Once you’ve gotten all of the above sorted, you’re really into over-engineering for most situations. But I love a good gadget as much as the next person, so here’s a few other bits and pieces I use regularly
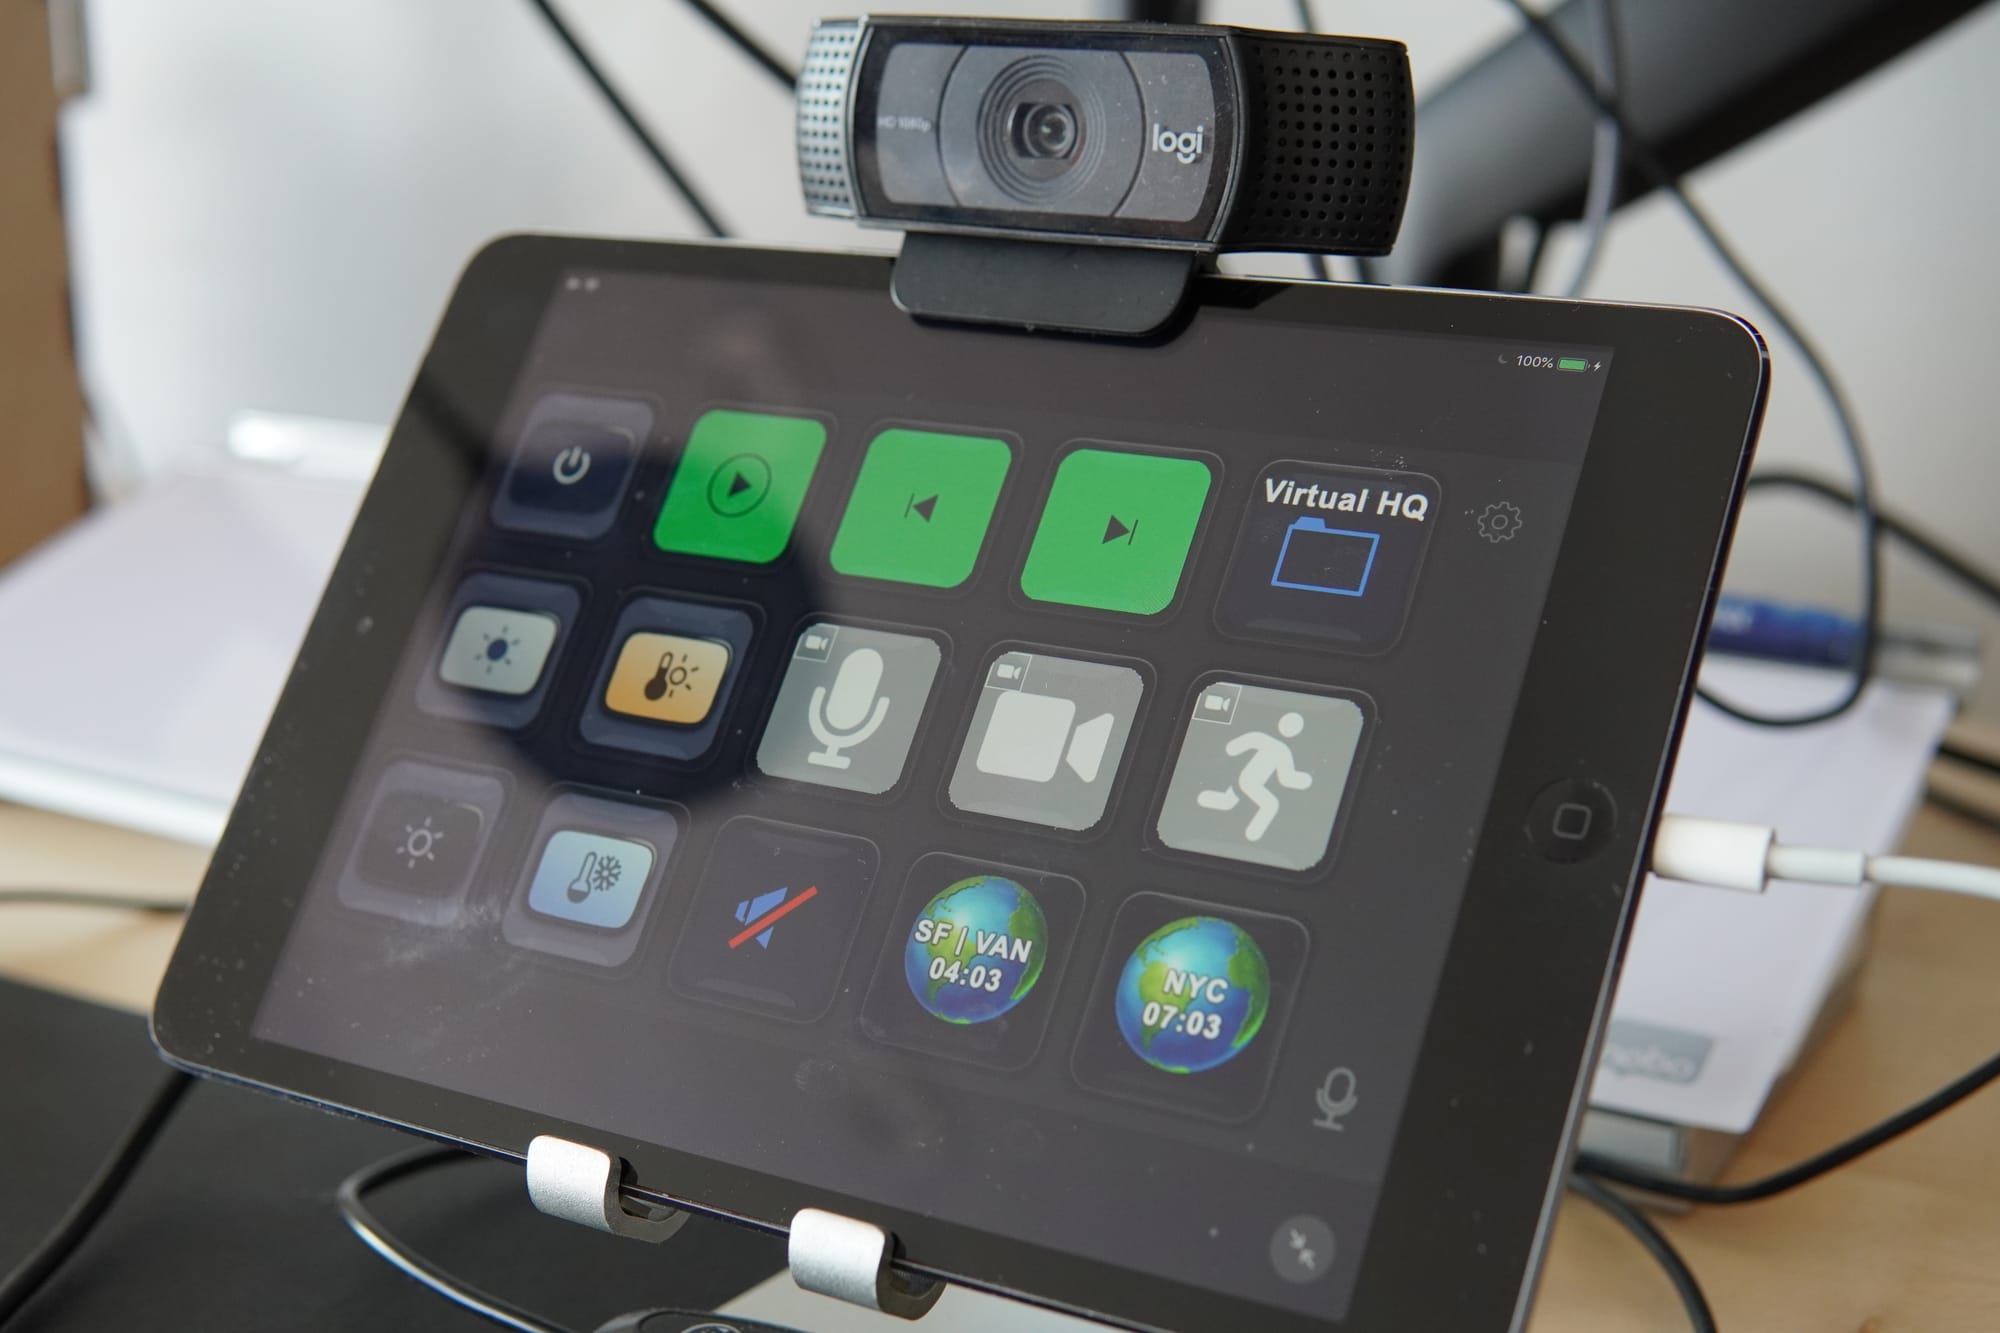
- Stream Deck Mobile ($25 per year): I had an old iPad Mini that wasn’t doing anything else, so I purchased Stream Deck Mobile and stuck it on a stand. It’s definitely helpful as you can configure it to control just about anything from Zoom to your lights, to playing random noises in meetings. If you don’t have a spare iPad or iDevice lying around, you can also buy a physical Stream Deck for a significantly higher cost from Elgato.
- Elgato Green Screen ($160): I really only pull this out for videos where I’ll do a bunch of post-production, but it’s a helpful tool, especially if you can’t really otherwise control your background due to space constraints etc. The screen shot in the “Reincubate Camo” section above involved the green screen.
- Jarvis Hardwood Standing Desk (starts at $1139): You’re going to need somewhere to put all this stuff obviously, and I put mine on a Jarvis hardwood desk. It’s adjustable over a wide range and is big enough to hold everything comfortably.
The content is still the star
The choices I’ve made in terms of equipment reflect what works for me and I’m sure many others have made equally valid choices, both more expensive and cheaper. It’s important to remember though, that at the end of the day, video and audio equipment are just tools to help make your content shine. But if that content isn’t polished to start with, no amount of fancy lenses or shiny lights will make it interesting. Be sure you invest the time and effort there before you worry about how you look or sound.